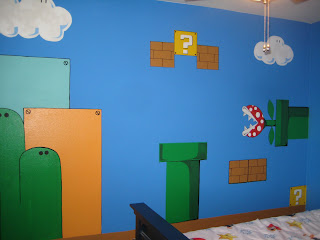
After the Batman wall, I got a request to do a Super Mario Bros wall for some other friends. I really wanted to start this. Me and my family LOVE that game and I just thought it would be a fun project. I was right!
Here were two of the images I scanned through on the web for wall ideas. I was going to use these.
So, now on to the wall..
This was my blank Canvas.
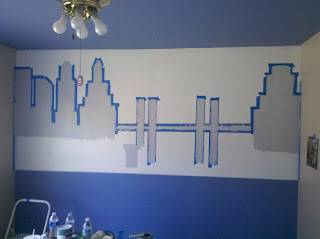
once again,, started taping.
This is where this project began to look like it would definitly work.
When I started doing the detail, it began to really look good!
Finished project. Mario, Luigi and other coins were Fathead stickers that would be added later.
And, once again, I have to include a pic of the boy that this room was created for.
Final pic with Fathead mario/luigi stickers
Wednesday, April 13, 2011
Batman Wall
This was my first real wall mural request. Had breakfast with a friend and he handed me a picture of a wall from a Crate n Barrel catalog. It was a Gotham City cityscape with a big Batman flying in the center. He said his wife asked him if he knew anyone who could do this. He said " Steve can". So,,, now I HAD TO.
Here is the pic he showed me:
So, I start project. Here is the wall ( complete with wallpaper that needed to be stripped and repainted)
Wallpaper stripping is by far one of the worst jobs that I have done so far.
Now the fun begins. Wall is ready for mural finally.
Didn't know how to begin. But the ol " Fake it till you make it." mentality came out. I just started taping and painting.
This is the point where this mural started to look like it would work.
Background buildings done. Now on to foreground buildings.
Buildings painted. On to windows.
Finished the mural. Batman was a Fathead sticker that my friend had purchased earlier. There was also a lamp from the C&B catalog that was going up next.
And this is the finished mural project.
Last picture is,, of course the reason I do this. Picture speaks for itself.
Kids Nightmare Before Christmas Wall
So, I have been wanting to test my skills on a wall mural for my kids. I had drawn and painted small scale things. I figured, why not? It took alot to get the courage to start this project. So many things to think of. The paint was expensive ( about $100.00 for paints/materials). What if I mess up and it doesn't look good? I was painting on a wall that if I messed up, it would have to be repainted with a real light color yellow.
Finally, I just did it. I can only either screw it up, which would be a longshot... or create a masterpiece. :)
Things at this point started looking like it would really work.

Here is the detail of the pumpkin patch.
Jack with detail came to life
I had the kids paint a pumpkin so they can always look at the painting and think they had some part in it. Here is Emily's pumpkin
The bottom pumpkin is Steven's pumpkin
 |
| pencil drawing on wall |
 |
| started painting |
 |
| more color |
 |
| almost done. had to stop to go pick up my kids |
 |
| My babies reaction to their new wall |

Here is the detail of the pumpkin patch.
Jack with detail came to life
I had the kids paint a pumpkin so they can always look at the painting and think they had some part in it. Here is Emily's pumpkin
The bottom pumpkin is Steven's pumpkin
Subscribe to:
Posts (Atom)


